Wednesday, February 26, 2014

Welcome to the North Pole SAL for February


Hi everyone, I hope you are bouncing out of your seats waiting to get linked up. I made the decision to pay for a thumbnail linky service because pictures are much more interesting than text so even if you have a picture of some wrinkly fabric ready for your quilt I expect you to link up.

I put a call out now to anyone who sewed along last year to do a bit of a round up post and link up your progress. I know some were very close to finishing the quilt.

I still have my quilt to finish but I am not working on that until we move into the new house so I have started the cute table runner on the back cover of the book. I am doing it with a mixture of machine needle turn, which I suppose is really iron turn, and regular hand needle turn.


The straight pieces are easy to do with the machine using a blind hemming stitch and some fine thread. No. 13 is my stitch. It goes stitch stitch stitch zag and I make the length of the stitch around 1mm and the width of the zag about 2.
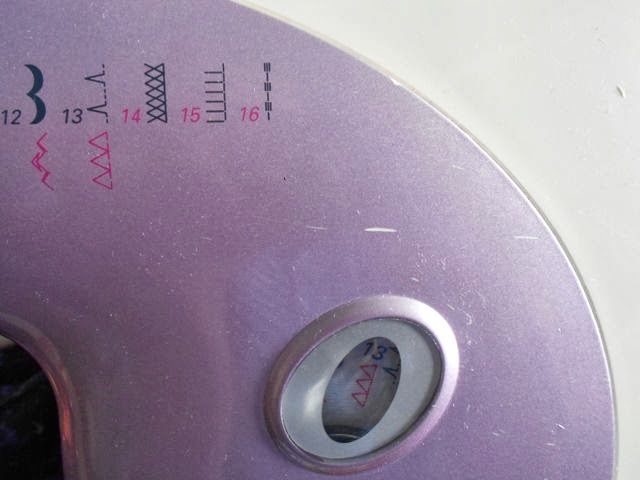

You can just see where the zag catches the fabric.


I am using invisifil  by Aurifil in a grey shade that blends with most colours.


For the needle turn by hand I am using the same thread and a fine flexible beading needle. I am not sure if it is the same as a straw needle used for needle turn but it works just fine. I will be doing the pointy bits by hand.

I have the stars and moon cut out. These three are positioned ready to stitch. I am using freezer paper and cutting out with a seam allowance. I have learned that you don't snip anything until you are actually sewing and then only just before you sew it down. A few frayed threads makes it almost impossible to sew down properly.


I look forward to seeing what others have been doing so far. Please link up. We all want to see what everyone has been doing.
Remember:
Include a link to my post in your blog post
Link your post URL not your whole blog
Linking to a photo is fine too
After linking visit 2 links before you and leave them comments
Come back again later and visit two links after you and leave comments.

Don't forget to pin your work and +1 others posts on google plus. I think there are still a lot of books on book shelves that can be dusted off this year.
You can also join the Flickr group and add you photos whenever you like.

Not into Google Plus?
Leave a comment on
  Flickr
  Pinterest

Happy Quilting and Crafting,
Val

Sunday, February 23, 2014

Zippy Pouches


I am all excited about having a stall at the local Easter Fair market. I have my fused glass jewellery that I want to sell but I couldn't help trying to find something to sew. I tried the tote bag but I think that is not viable so I tried some little keepsake pouches that would be suitable to put my jewellery pieces in. I have finished two and have six more ready to sew up the sides and four more ready to put the zips in.

Production line
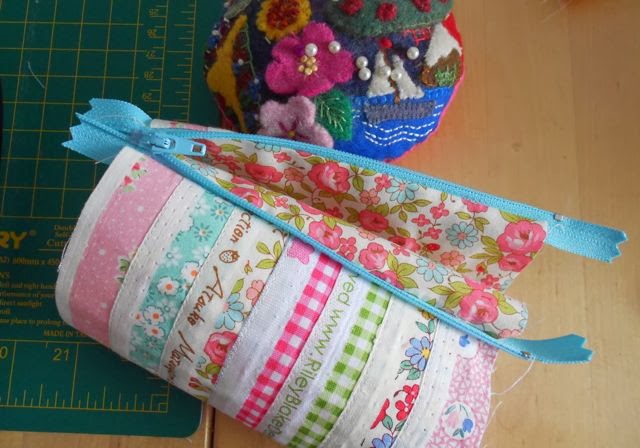
While making the 9 patches I cut off the selvedges and I love a good selvedge zippy. In the past I have had trouble sewing the selvedges together in parallel lines so I had to come up with a new method for me.
I had them all laid out and thought it would be a good idea to lay them out on a piece of iron on interfacing to hold them in place. I used my trusty teflon sheet to stop the little overhangs of gluey bits from sticking to the iron and I stuck them all on the interfacing. It was so simple to sew them neatly and in lovely straight lines.


I made two little zippies out of my selvedge fabric.


I cut the lining to match.


Sewed the zip between the outer and the lining then gave it a press.


Next I folded the outer up in front and the lining up in back and sewed them to the zipper.


Undo the zip and turn it all right side out to press around the zipper.


Do the zipper up about an inch then turn it all inside out again. Line up the outers and the linings separately and sew across the zipper on each side. I left an opening in the lining on one side or turning.


Give it a press and a bit of ribbon and voila!


I love zippies and there are lots of great tutorials out there. Here are just a few.

A simple clutch - like mine but a bit bigger.
A variation on the clutch - smaller and with cute curved corners.
A really easy way to do the zipper and lining.
Yet another way to get a really neat zipper.
A pencil case in the same style as my keepsake pouches.
A gorgeous little pleated clutch.
A nice border next to the zipper.
The wide mouth pouch.

You can gets lots of inspiration from my Pinterest board Zippy Things. Why not follow me. I am always pinning zippies.

I finished my latest dish cloth.


And I even found time to break the vacuum cleaner. It is now packed up ready to go off for repair. I think it needs a new motor. Dyson pay for the postage and it isn't even in warranty. They said maybe a few hundred dollars. Sounds better than $700 for a new one.


Make sure you check out those zippy pouch tutorials and anyone sewing along with Welcome to the North Pole don't forget Wednesday 26th Feb is the post day. I will be posting my progress and setting up a thumbnail linky for everyone to share what they have done.

Comment options:
Flickr
Pinterest

Happy Quilting and Crafting,
Val

Thursday, February 20, 2014

WIP Wednesday


I am so glad I have managed to make another owl. I am quite a few behind now but I plan to make two more next month and try to catch up. I have to wait six months to get the others out of storage but I should be all caught up and ready to put the quilt together by then. The BOM finishes in August.
For this one I cut his eye sections in one piece. The pattern has it in two pieces but it doesn't work out right. The second layer is from a floral fabric and the darker petals make cute eyebrows. I am using raw edge applique and machine buttonhole stitch.
You can see my blocks pinned here.


I have been working away at another dish cloth. The blackberry pattern is much slower than the lacy pattern. I am using smaller needles too to get a firmer cloth. The lacy one looks to be more holes than cloth now :D

Don't forget I am having a linky party for everyone working on Welcome to the North Pole next Wednesday 26th Feb. It will be great for everyone to see what others are up to.

I am linking up with WIP Wednesday over at Freshly Pieced today.

Comment options:
Flickr
Pinterest

Happy Quilting and Crafting,
Val

Tuesday, February 18, 2014

Some Sewing

I love to just pop in my sewing room and make something that I saw on the internet or make some new clothes. I haven't done much clothes sewing lately. I did buy that nice shell fabric before I left Brisbane and it is well on the way to being a blouse. I just need to get some interfacing from Spotlight tomorrow so I can finish it this week.


The other day I made a star dresden plate block that I saw on another blog. Phew! Just managed to find the link in my browser history. I was sure I saved it somewhere. You can find the tutorial at Snips Snippets blog .


I thought I would play at making a market bag that I might be able to sell at the Easter markets here this year. I wanted to see how fast I could make it. It is a simple bag that I made with homespun but it took me nearly and hour. I don't think they are a good item to make money on. Maybe if I could make 4 in a hour. Maybe I will try making some pot holders.
Anyway, here is the bag. It still needs a rinse and press to get the embroidery pen out properly. It is meant to fold up so I have to still put on the button loop and button.


I used the tutorial from Yarngeek

Here is a progress picture for our new house. I will be starting a new blog about the house soon but I am just really excited to have nearly got to signing the contract.


Nearly forgot. If you get a chance check out this BOM. The blocks look like old fashioned tiles. We have only missed one month and the Feb block is up now. Well worth a look.

Leave a comment on Pinterest if you are not into Google +

Happy Quilting and Crafting,
Val
Related Posts Plugin for WordPress, Blogger...