Showing posts with label tutorials. Show all posts

Monday, March 3, 2014

Scrappy Stars for March


I am always looking for ways to use my scraps. This year I have had a special liking for HST and star blocks so scrappy stars seemed like a good way to combine everything. This scrappy star is made from a free tutorial I got from Craftsy. They almost look the same.


I made sets of 2 HST with a quick make method. I put two small squares on top of each other and sewed along each side of the diagonal then cut them apart. In the tutorial it says to cut triangles and sew them together so you get only one of each colour. I was planning on 4 of each colour.

Now I know a method for getting 4 of each colour all at once by laying two larger squares on top of each other and sewing all around the outside edge.

You can see tutorials for both methods and great sizing charts at Blossom Heart Quilts

Of course, I couldn't resist the method that gives you 8 HST the same by sewing along both diagonals and making 4 cuts. So today I am preparing to make a draw string bag with a circular base. I will use the HST on the lower half of the bag. In a book I got from the library the bag is called a pompador.

The 8 at a time method is described beautifully at Sew Mama Sew.

Here is a quick look at what I did.
I did some calculations to work out what size square I needed to end up with 3 inch unfinished HST. I thought about making 2 1/2 inch unfinished HST but I decide they would end up too small.
My square had to be (2 x 3) + (2 x 3/8) on one side or 6 3/4"
I use fat quarters and cut 1" of selvedge off then refolded and cut a 6 3/4" strip. I put the ruler so I could just see the edge of the fabric past the 6 3/4 inch line. I could then cut 3 squares from this strip. Each time putting the fabric a fraction past the 6 3/4 inch line.

I made 3 of each dark colour and 6 of the light colour.


Put them right side together and draw the diagonals in pencil.


When I sewed the seams I did a very scant 1/4". More like 3/8". My foot has the 1/8" markings and I line up with the first marking. I do a lot of my piecing like this. It is amazing how much you lose when you fold open the seam.


Sew both sides of each diagonal then cut. The first two cuts along the pencil line are easy. The second two cuts you have to make sure your block is square with the ruler.


Because my fabric is quite thin and soft I decide to iron the seams to one side. My HST are a perfect 3" square.


HST are one of my favourite play things :)

Today I am linking up with Scrappy stars at Majas Paradis


The first in the linky, Gudren, has made some great hexed stars from Quilter's Cache. I put pins for 2 types of hexy star in my Favourite Quilts and Blocks Pinterest Board

I am also linking up with Anything Goes Monday at Stitch by Stitch.

As usual, you can comment on:
my Flickr photo 
my Pinterest pin
or join Google+ and leave a comment below.

Don't forget to get onto Bloglovin and like all your favourite posts. Also +1 all your favourite posts when you visit them. It makes them accessible to lots more people.

Nearly forgot to tell you about a great new linky party where you can link up old posts that fit the theme of the week over at Val's Quilting Studio. Val is such a great name!
This week's theme is alphabet quilts and sewing projects. It will usually be on Tuesdays but this week it is incorporated into Anythng goes Monday. Just scroll down to find it.

Happy Quilting and Crafting,
Val

Sunday, February 23, 2014

Zippy Pouches


I am all excited about having a stall at the local Easter Fair market. I have my fused glass jewellery that I want to sell but I couldn't help trying to find something to sew. I tried the tote bag but I think that is not viable so I tried some little keepsake pouches that would be suitable to put my jewellery pieces in. I have finished two and have six more ready to sew up the sides and four more ready to put the zips in.

Production line
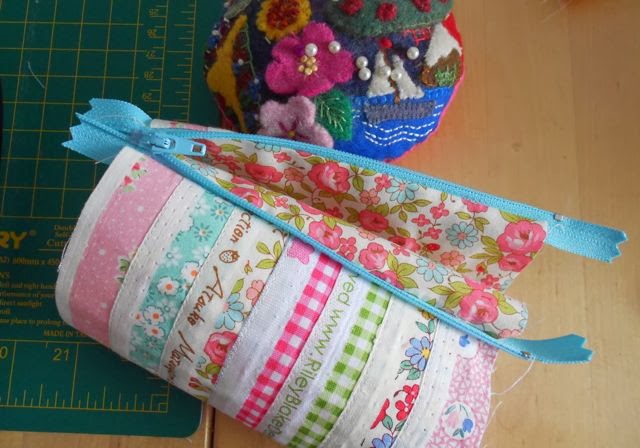
While making the 9 patches I cut off the selvedges and I love a good selvedge zippy. In the past I have had trouble sewing the selvedges together in parallel lines so I had to come up with a new method for me.
I had them all laid out and thought it would be a good idea to lay them out on a piece of iron on interfacing to hold them in place. I used my trusty teflon sheet to stop the little overhangs of gluey bits from sticking to the iron and I stuck them all on the interfacing. It was so simple to sew them neatly and in lovely straight lines.


I made two little zippies out of my selvedge fabric.


I cut the lining to match.


Sewed the zip between the outer and the lining then gave it a press.


Next I folded the outer up in front and the lining up in back and sewed them to the zipper.


Undo the zip and turn it all right side out to press around the zipper.


Do the zipper up about an inch then turn it all inside out again. Line up the outers and the linings separately and sew across the zipper on each side. I left an opening in the lining on one side or turning.


Give it a press and a bit of ribbon and voila!


I love zippies and there are lots of great tutorials out there. Here are just a few.

A simple clutch - like mine but a bit bigger.
A variation on the clutch - smaller and with cute curved corners.
A really easy way to do the zipper and lining.
Yet another way to get a really neat zipper.
A pencil case in the same style as my keepsake pouches.
A gorgeous little pleated clutch.
A nice border next to the zipper.
The wide mouth pouch.

You can gets lots of inspiration from my Pinterest board Zippy Things. Why not follow me. I am always pinning zippies.

I finished my latest dish cloth.


And I even found time to break the vacuum cleaner. It is now packed up ready to go off for repair. I think it needs a new motor. Dyson pay for the postage and it isn't even in warranty. They said maybe a few hundred dollars. Sounds better than $700 for a new one.


Make sure you check out those zippy pouch tutorials and anyone sewing along with Welcome to the North Pole don't forget Wednesday 26th Feb is the post day. I will be posting my progress and setting up a thumbnail linky for everyone to share what they have done.

Comment options:
Flickr
Pinterest

Happy Quilting and Crafting,
Val

Sunday, January 20, 2013

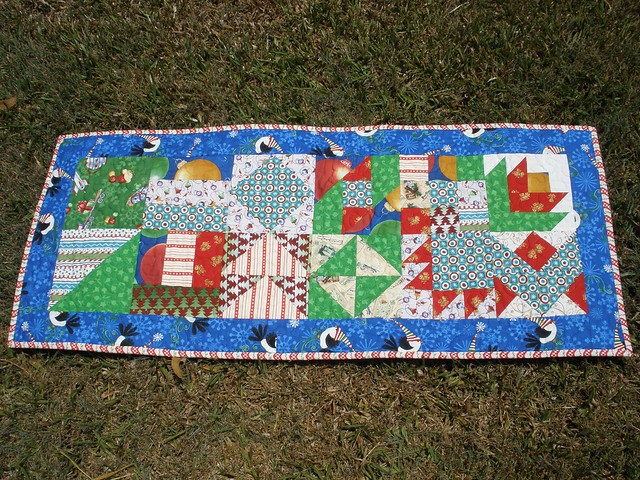
12 Days of Christmas Quilt


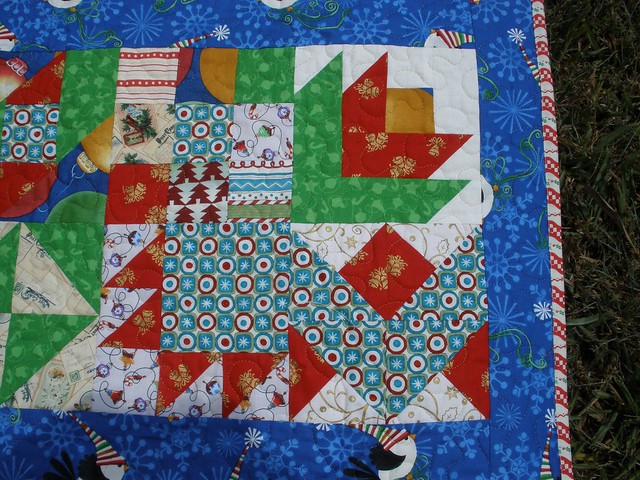
I have greatly enjoyed trying to design and make some new blocks to complete this runner. Because all the blocks had to be 6 1/2 inch unfinished I had to do a bit of trial and error with some of the triangles and I now have a better understanding of the various sized triangle or squares required for half square triangles.

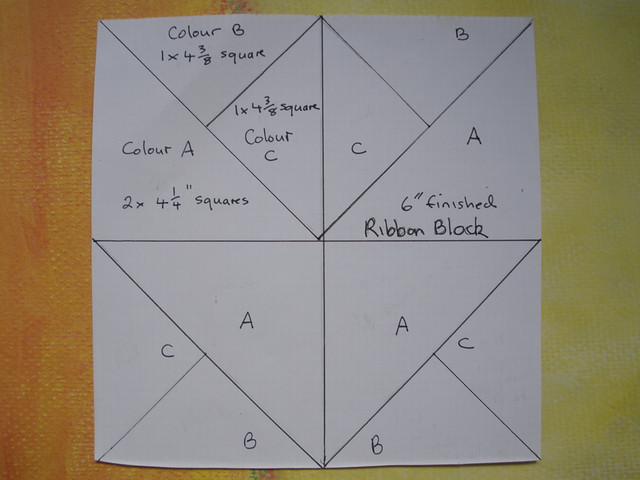
Classic ribbon block
This tutorial is for a 12 1/2 inch unfinished block
Required sizes for a 6 1/2 unfinished block:


Bear paw tutorial
One paw in this tutorial is a 6 1/2 inch unfinished block. It shows 4 put together.

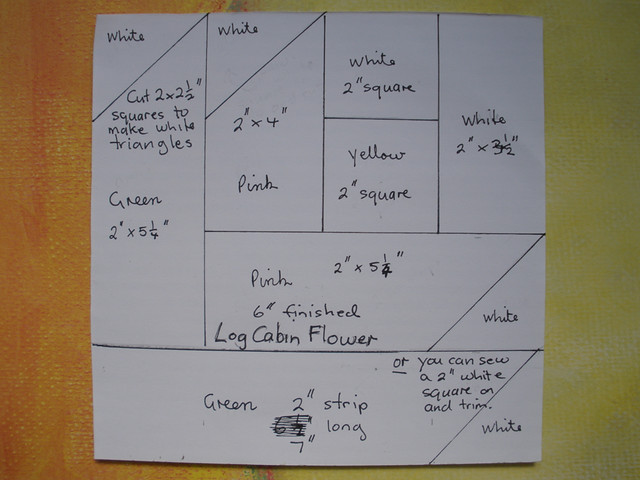
Log Cabin Flower block
Another favourite was the flower log cabin block. I can't find a tutorial for this one so here are some basic piece measurements.


I cross cut  2 1/2 inch squares to make the triangles then sewed as in the picture. The lengths of the strips that I have written in include enough for that extra bit on the right hand end.


The flower block and ribbon blocks on the end.


My latest bit of fun has been exploring google plus a bit more than last time. I wanted a way for the North Pole QALers to communicate without having to write a blog post. We can start a thread and all have a say or just make an update report to everyone in the group with a few clicks.

Happy Quilting,
Val
Wednesday, November 7, 2012

A Cockatoo and a Cup or Two

I have searched around on the internet a bit and there are just too many owls and kitties or pumpkins and crows or red cardinals and snowmen. I am going to make a bit of a statement about Australian themes regarding cute or seasonal or holidays by creating a variety of designs.

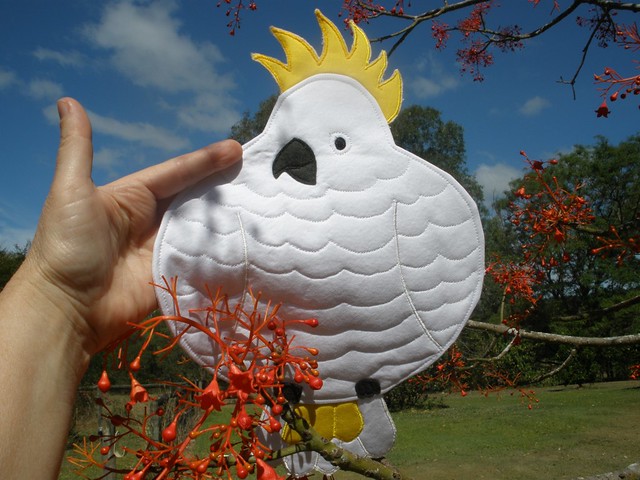
I have started on the flannel flowers but they are quite elegant and dignified so I have to work a bit harder on projects to go with the designs. I thought the cockatoo would lend itself to some more casual projects so to start with I have designed and made a cockatoo mug rug or teapot mat. I have the Andy Warhol inspired pot holder in the works too.


Download the pattern from google docs.

Also rather than fill the page with instructions I have made a flickr set here.

I thought he would feel at home with my cute teapot for one.


My morning was taken up testing the 6 sided pear pin cushion pattern. It looked tricky but was really quite easy so now I am ready to add the sweet flannel flower stitchery or applique to the pattern.

I put a big washer in the base to give it weight. I bought these at the hardware for this purpose.


Saturday, April 14, 2012

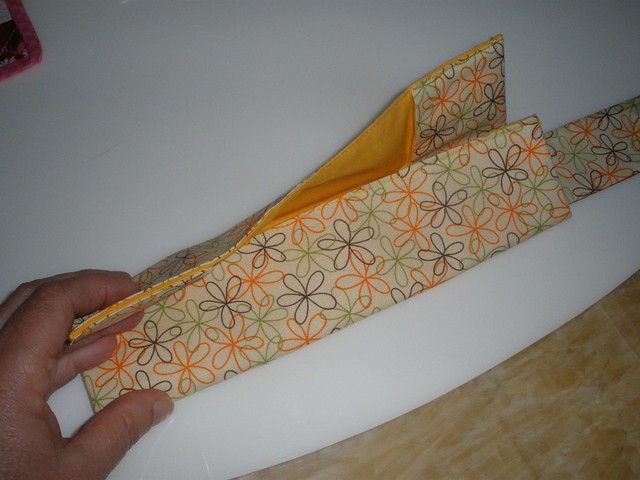
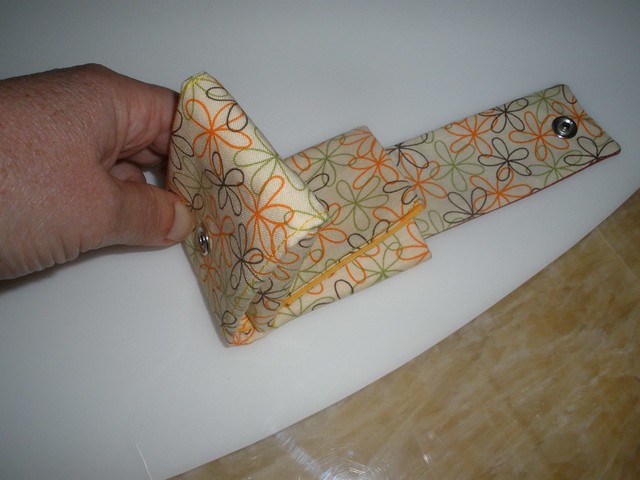
Tea bag wallet


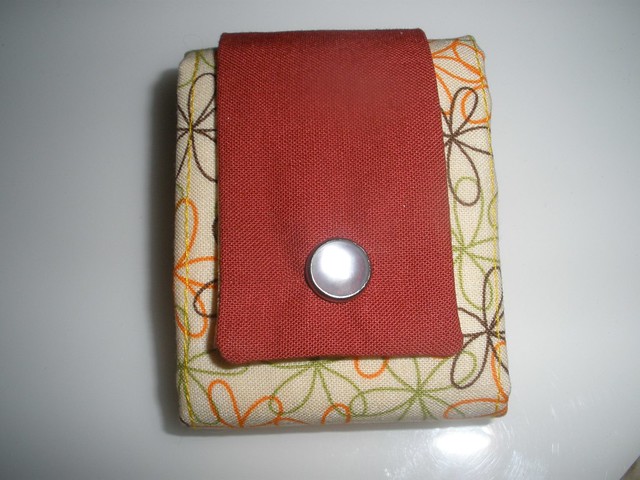
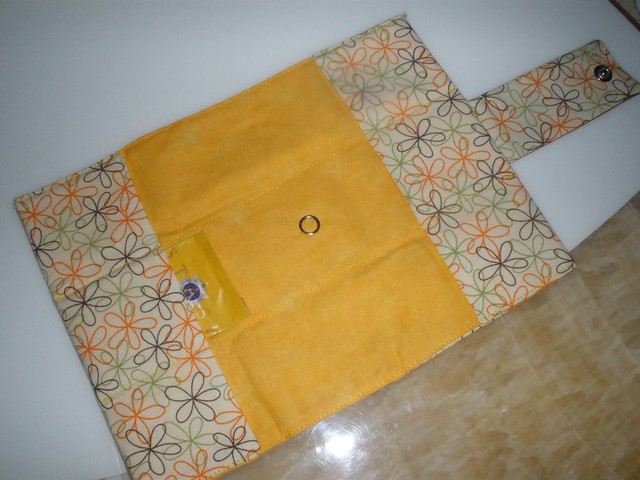
 I tried out the tea bag wallet tutorial from Zoe at SewitGirl. I used the dimensions she said and found that three foil wrapped bags will only fit if you fold in the edges of the packet.

 
7  1/4 inches wide could be closer to 9  1/4 inches to fit three sachets. I also decided that the double thickness pocket was a bit bulky and since I don't use sugar sachets I didn't need the extra pockets. So I made it shorter and folded the end over only once. Total cut length reduced from 19 inches to 15  1/2 inches.

I then had to sew the strap on the outside and make it a bit narrower.


I like the tri fold pattern idea. It makes it nice and compact.


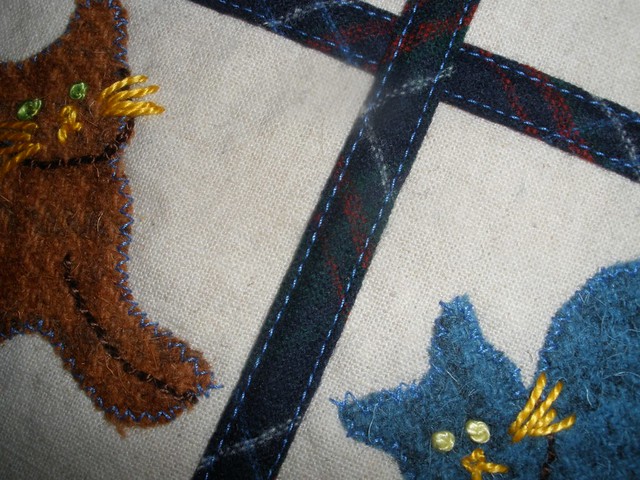
I have a sneak peak of a kitty item I am making for Quilt Kitty. It is a surprise, so don't tell her :)


Happy Quilting,
Val

Saturday, December 17, 2011

Just some cool patterns

I have been sewing little things and working on the knitted pigeon and surfing around. Here are some of the things I have found latley:
The bird card in the side bar was just beautiful and could probably be used for applique too.
http://mmmcrafts.blogspot.com/2011/05/make-momma-bird-card-or-two.html

She also has the most amazing 3D owl.
http://www.skiptomylou.org/2010/06/20/3d-paper-owl-from-mmmcrafts/

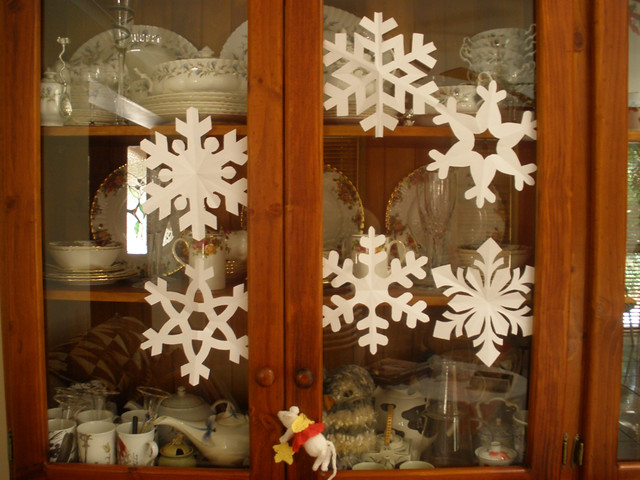
Then I found the fabulous paper snow flakes. You have to print them out then fold and cut. The cutting is surprising easy compared to the lovely pattern you get. mmmcrafts links to the patterns but she also has a good tutorial on how to do it and a blank snowflake fold pattern so you can make your own designs.
http://mmmcrafts.blogspot.com/2009/12/snowflakery.html


There is a felt or paper flower template with several layers of petals and a stuffed toy monkey...
Have a look at all her things. And the lizard is really cute too.
http://mmmcrafts.blogspot.com/p/free-patterns-and-tutorials.html

There is a cute chicken stitchery here. Click Freebie in the menu.
http://www.memesquilts.com/memeindex2.htm

There are some lovely stitchery patterns and applique ideas here. The menu on the right has all the categories.
http://www.french-knots.com/page/4/

There are some nice stitchery patterns here.
http://zuill.us/andreablog/category/embroidery/free-patterns/

There is a cool pieced pumpkin pattern here.
http://www.fvqg.org/05archiv/1005.htm

There are some cute doll patterns to buy here. I like Hattie and Homer Hobart :)
http://www.amongcountryfriends.com/patchwork.htm

I came across this site while trying to find where I got something else from and found the cutest scottie dog mini quilt. The site is about the history of quilting and is very interesting.
http://www.allcrafts.net/fjs.htm?url=www.womenfolk.com/baby_quilts/american-girl-dolls.htm

I liked this cute set of cat blocks.
http://www.allcrafts.net/fjs.htm?url=web.archive.org/web/20080116230112/http://quiltmaker.com/patterns/patt2/

I imagine that this site is not new to most but I found it had some good patterns. This is where I got the link to the cat pattern above.
http://www.allcrafts.net/quilting.htm#Pieced

I also had time to follow the Moda Blog hop that I found links to on Sharon's blog. I printed out a few on card, cut them in half and sewed the block and recipe back to back. I need to get some more card now to do the rest.


I found a different looking little bag pattern here.
http://quiltworld2.blogspot.com/p/instructions-for-quilts-crafts.html

I know you all have plenty of time to play on the computer so I hope you enjoy collecting some of these patterns.


Happy Quilting,
Val
Wednesday, April 6, 2011

Around the traps


Nothing like some good give aways. Some buttons up for grabs by visiting the Button Mad blog and The Painted Quilt. Button Mad links back to The Painted Quilt.

What about joining in with Quilt Class 101 at http://chasingcottons.blogspot.com/. There is a big giveaway on today, the first day. Rebecca will be sharing tutorials on a range of topics every Wednesday for about 12 weeks with give aways each week.

Cheryl over at Polka Dots and Rick Rack has decided to have a give away. Probably the result of spring fever :) Why not pop over to enter?

Seems like everyone is having give aways. I keep having to add things in. Jenny at All Sorts is giving you a chance to win her latest paper bunny dress up doll set.

The Homespun free web project is in now. Tea in the Garden

The felt spring bouquet at Wee Folk Art is lovely and the tutorial for roses and poppies is well done.

Good Luck and Happy Sewing,
Val
Related Posts Plugin for WordPress, Blogger...