Wednesday, November 7, 2012

A Cockatoo and a Cup or Two

I have searched around on the internet a bit and there are just too many owls and kitties or pumpkins and crows or red cardinals and snowmen. I am going to make a bit of a statement about Australian themes regarding cute or seasonal or holidays by creating a variety of designs.

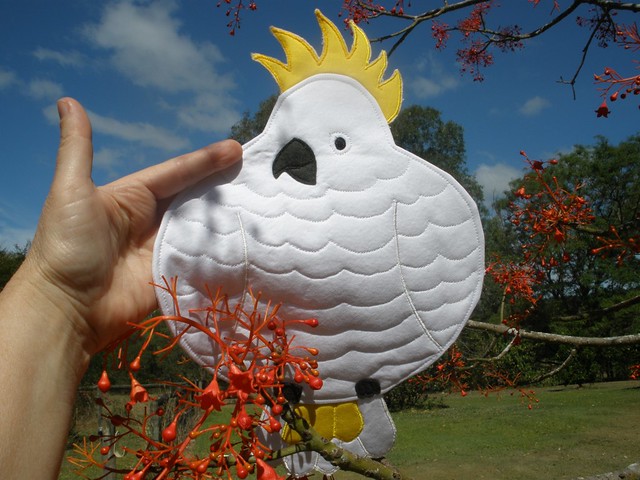
I have started on the flannel flowers but they are quite elegant and dignified so I have to work a bit harder on projects to go with the designs. I thought the cockatoo would lend itself to some more casual projects so to start with I have designed and made a cockatoo mug rug or teapot mat. I have the Andy Warhol inspired pot holder in the works too.


Download the pattern from google docs.

Also rather than fill the page with instructions I have made a flickr set here.

I thought he would feel at home with my cute teapot for one.


My morning was taken up testing the 6 sided pear pin cushion pattern. It looked tricky but was really quite easy so now I am ready to add the sweet flannel flower stitchery or applique to the pattern.

I put a big washer in the base to give it weight. I bought these at the hardware for this purpose.


Sunday, November 4, 2012

Aussie Autumn Theme


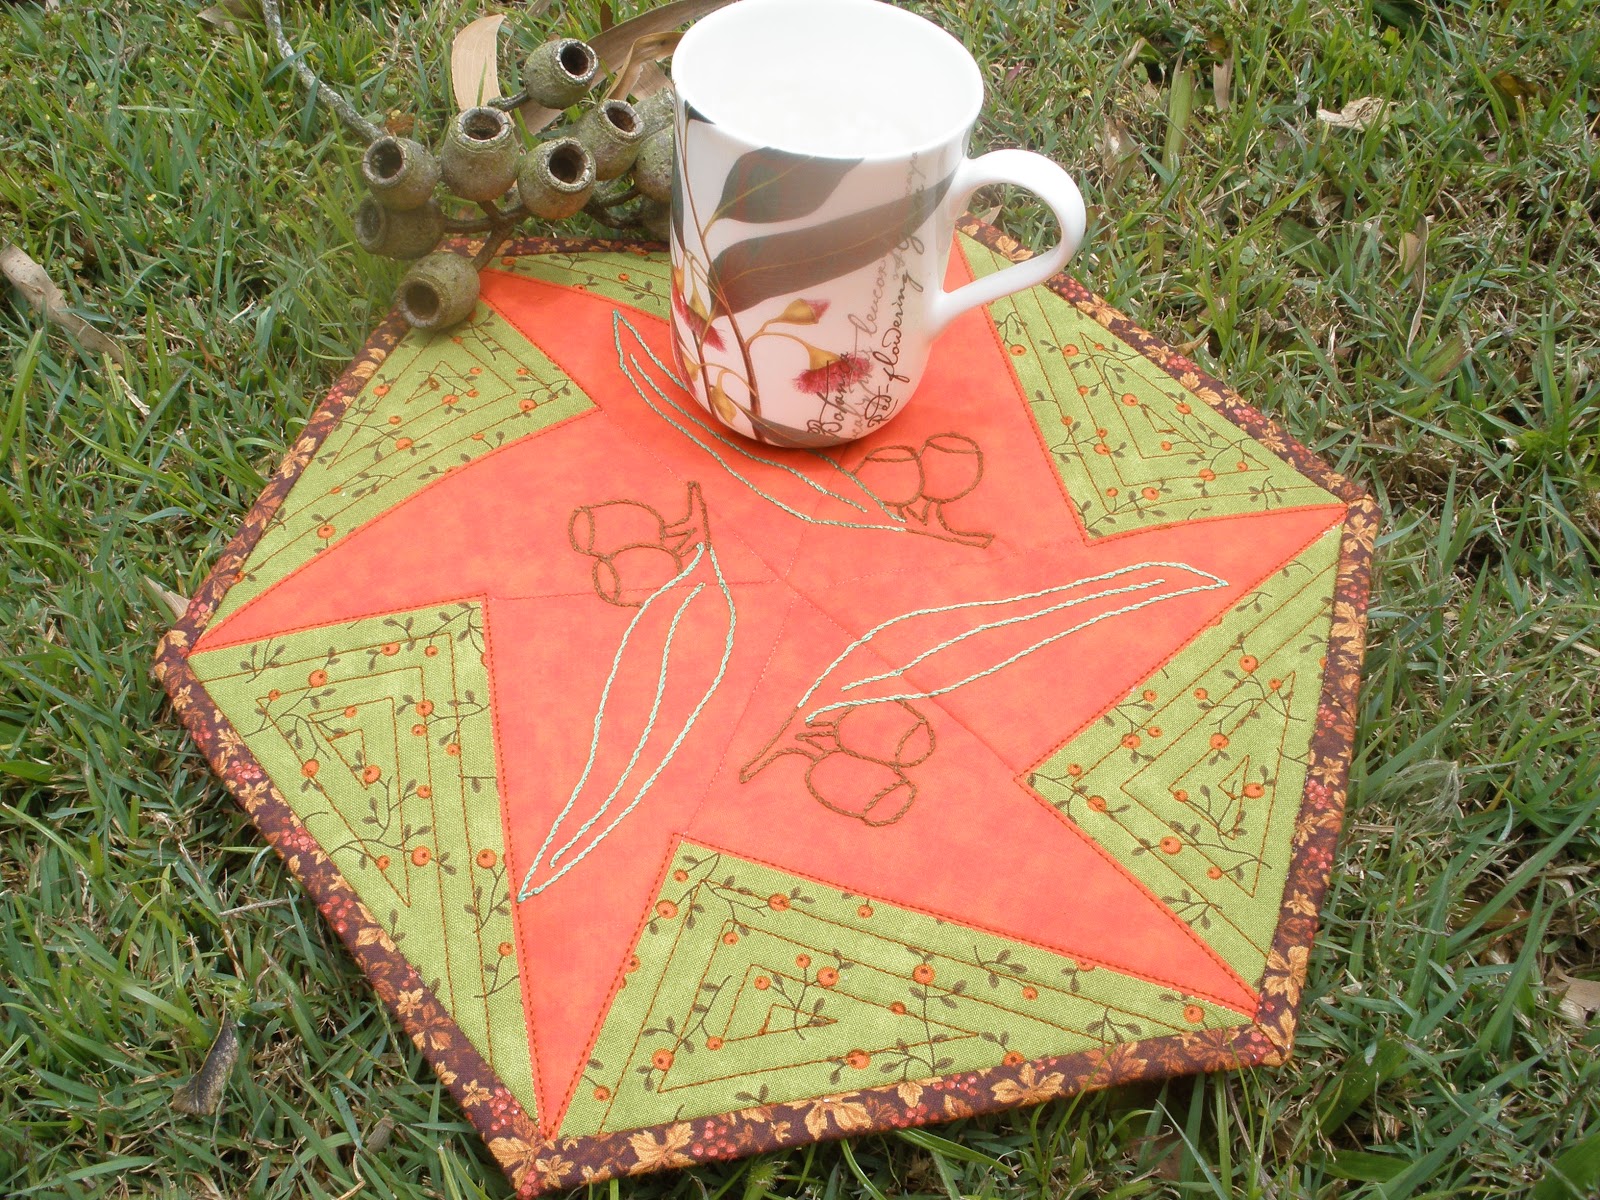
I had some left over triangles of fabric that I didn't use in my table topper but they were just too pretty not to make into something. Six pieces nicely makes a mug rug or candle mat size.

The colours meant that pumpkins and crows first popped into my head as decoration but it was at this time that I made a decision to look for Australian themes. Since the Eucalypt trees generally flower during spring and summer the gum nuts are an autumn feature. Using a public domain royalty free piece of clipart I created a circular pattern to stitch onto my mat. I would like to share my pattern with you so you can download it by clicking the image of the drawing and saving it.


Because I now have a new plan to help me choose fabrics I will be collecting colours that work well with Australian themes. Nothing like buying fabric to a plan. It means you can easily justify to yourself those huge purchases. (I don't really feel the need to justify my purchases to anyone else. ) The trouble with a new plan is that now I have to clear some of the bright and bold patterns already in the stash to make more room.
Lots of cushions and table cloths maybe, or tote bags and zippy things :)

Happy Quilting,
Val

Friday, November 2, 2012

A Kaleidoscope

What a roller coaster ride I had on the Wicked blog hop. I found so many wonderful blogs and I even found another Halloween blog hop! I will be signing up for more blog hops at Madam Sams.

I can't even remember how I found an amazing Russian blog. Maybe on Pinterest - but my Pinterest fun is a whole other story. Let me try and keep on track here.


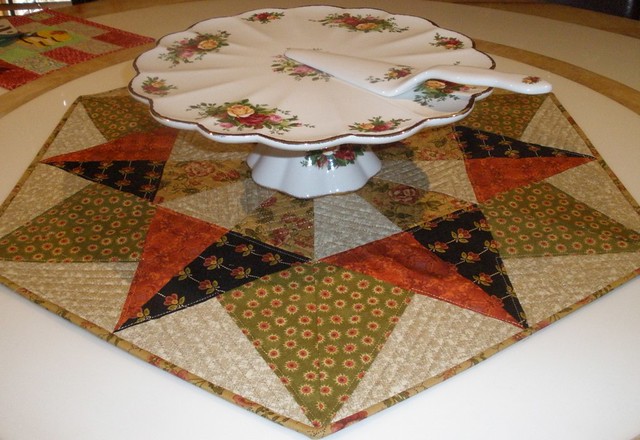
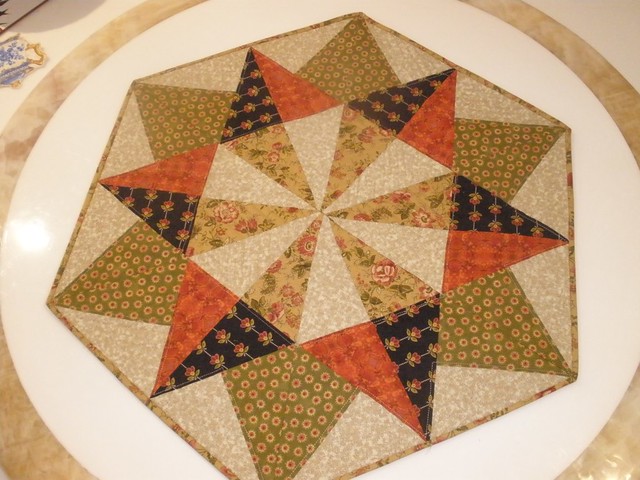
The Kaleidoscope Table Topper
Can't believe I have never noticed a pattern like this before.
I have this ridiculous fascination with the natural order of things and what could be more intriguing than making equilateral triangles from tubes and rectangles then jostling them around til a pleasant pattern forms. 

Choosing the right colour mix is pretty important as I found out. This topper has 12 dark attached to light fabric then 6 medium attached to dark fabric and 6 medium attached to light fabric for the centre. I am sure if you play around a bit there could be lots more amazing combinations.

The idea for my topper comes from http://roolen.blogspot.com.au/ 
Marina lives in Russia and I had to use Google translator to read her name but the projects speak for themselves. Her fabulous topper tutorial is here.
There is also a link to some further explanation about the equilateral triangles at Quilt studio
Marina has lots of tutorials and some great project ideas.

Here are the basic steps for the topper
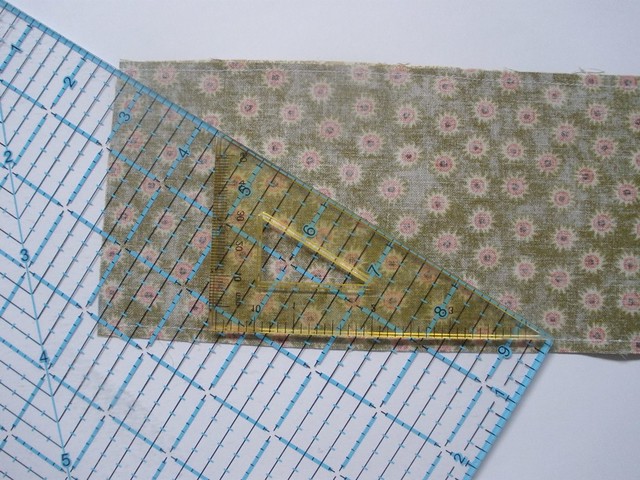
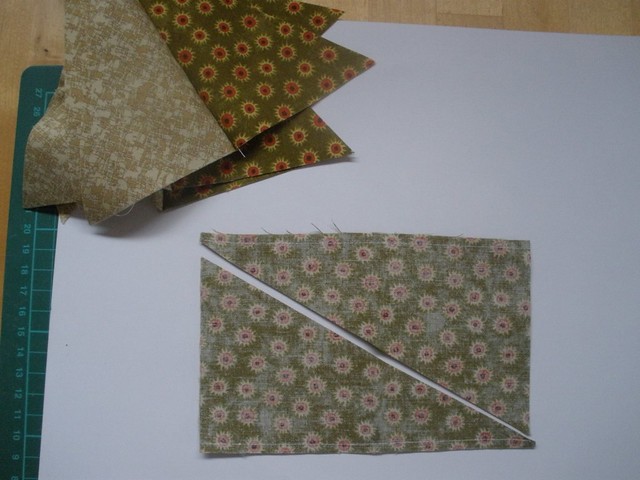
1. Choose your fabrics and cut out the strips. Mine are 9.5 cm wide (around 4 inches would do). Sew two strips right sides together on each long side with a 0.5 cm seam. 0.5 cm is in between 1/8 and 1/4 inch and my satin stitch foot is made for stitching 0.5 cm.

2. Work out a line that slopes at 30 degrees and goes from seam line to seam line. Mark where it comes to on the tube. This is how big to cut your rectangle pieces. Mine measured 16 cm. Cut 3 rectangles to get 6 triangles.


3. For the 12 dark and light triangles you need to make 6 with the dark on the right and 6 with the dark on the left. Cut 3 rectangles down from left to right and 3 rectangles down from right to left.


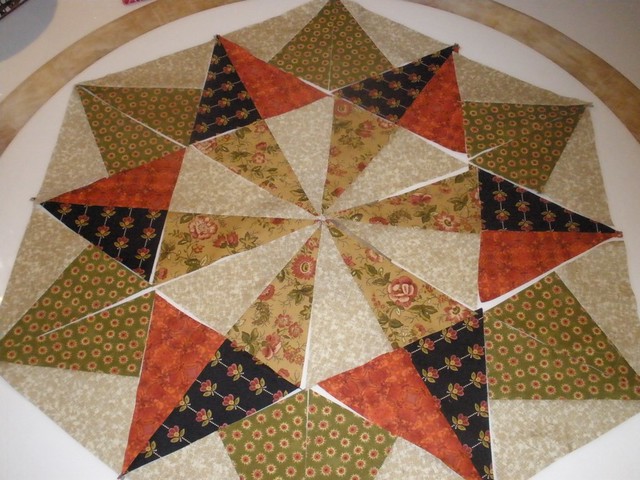
4. Cut all the triangles and I pressed the seams open. Play around to get a good look.


I settle on this one.


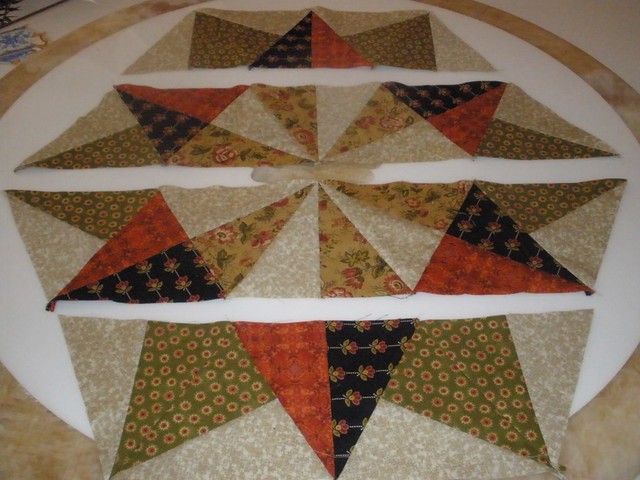
5. Sew the triangles to make 4 rows then sew them together.


I didn't want to spend too much time quilting so I decided on some straight lines. I used one of the medium colour fabrics for the binding. I sewed it on the front, turned it to the back then on the front stitched in the ditch with nylon thread.


You can see the quilting here.
I love my new cake stand and cake slice
Sometimes I like to 'stitch outside the ditch'. Now I really should get back to the not nearly finished enough cat quilt.
image source

Any suggestions for some interesting short projects that you may have tried?  
I'd love to hear them.


Thursday, November 1, 2012

My Wicked Winner

I put all the names in a bowl and pulled out Lynne of Never To Hot to Stitch.
Congratulations Lynne.

A lovely welcome to lots of new followers. Please come back often. I am having a designing frenzy lately and will be posting some originals and some old favourites. There are just too many daisies and pumpkins and crows out there.
I am going to replace them with flannel flowers, gumnuts and sulphur crested cockatoos with a few wallabies thrown in for good measure.
Don't you just love the elegance of the flannel flower.


I may even have to have another give away. There were several no-reply bloggers trying to enter my give away. Check your profile and make sure there is an email link included.

Happy Quilting,
Val
Related Posts Plugin for WordPress, Blogger...